Archetypes List
Reverse: 1999 archetypes for the current (Atomic Heart) meta: pull planning, team building, viability, substitutes, and META relevance.
320 rows · 1,603 cells · 76 images
| Foreword | Team Performance | ||||||||||||
| We know the README is long and dense enough already, but any tierlist will have lots of caveats. So here are some more detailed explanations of how to properly understand this page. | Viability | Explanation | META Relevance | ||||||||||
| Pull Planning | ⌽ This section will explain the general idea of the team, and give a basic understanding of the rotation. ⌽ We will not reiterate the characters' kits here; see the individual tier list first for that. ⌽ The viability column is just a suggestion of which modes the team can easily do well in. ⌽ Certain Raid make certain team shines way above the other team. The tier here is going to be an approximated average of their performance. ⌽ Focused Flashback T0: full clear all, T1: full clear favourable, T2: partial clear, T3: partial clear favourable. ⌽ The difficulty rating works the same way as in the individual tier list, see the README page. ⌽ The final tier of the teams here are graded relative to each other, as teams must at least be decent (since they're either meta or have good synergy) to be here at all. | ⌽ This section will include notes specifically in relation to other teams, and the current endgame content. ⌽ See the title of this page to see the lastest update ⌽ Calcs and rotations are from here, (click manual redirect) https://bbs.nga.cn/thread.php?stid=36649867 | |||||||||||
| ✔ | |||||||||||||
| Team Building | |||||||||||||
| ✔ | |||||||||||||
| What is This Page | What You Must Use | ||||||||||||
| ⌽ This page aims to compile the top meta teams, and any teams with interesting synergy where the team as a whole is much stronger than you might expect from individual units. ⌽ A team who isn't here isn't necessarily bad, but because of the meta focus, every team on this page requires very frequent reviews and updates so even a decent team with some generic synergy might not be included. ⌽ Don't follow the teams here if you don't want to, the game is easy enough you don't need to, the Teambuilding Tierlist is way more broad if you're not looking for BiS teams. ⌽ The main difference between this page and the Teambuilding page is we consider the whole general BiS team at once here, while Teambuilding generally considers each dps-support pair individually. | ✘ | Substitutes | |||||||||||
| ⌽ This section will include good substitutes for the characters labeled Flexible or Negotiable. ⌽ Negotiable means there are only a few viable alternatives. ⌽ Sometimes a character here will be better than the displayed team in specific situations. ⌽ Use the Teambuilding Tierlist if you don't have any of the listed options. | |||||||||||||
| List Tier | |||||||||||||
| T0 | |||||||||||||
| Liang | Team Performance | ||||||||||||
 |  |  |  | Viability | Explanation | META Relevance | |||||||
| Lucidscape | ⌽ Centers around Liang Yue's FUAs. ⌽ Try to maintain uptime on her Ult, and trigger either the green or red talon FUA every turn. ⌽ Green is preferred in most stages where enemies' defence >600. ⌽ A rank 3 Liang incantation deals more damage than 4 rank 1s against high defence enemies, look for merges or use them in the red/combined zone. ⌽ Flutterpage needs to maintain her tier 3 forcefield as usual. ⌽ Cheng can keep his Ult up by playing it from the green zone and using one card. Make sure FP stands in front of Cheng to sequence the turn start FUAs. ⌽ Marsha should Ult every 2-3 turns. | ⌽ Needs a lot of hand management, not recommended if you just like to click cards. ⌽ One of the top DPT Team in the game. | |||||||||||
| ✔ | |||||||||||||
| Raid | |||||||||||||
| T0 | |||||||||||||
| Focused Flashback | |||||||||||||
| T1 | Substitutes | ||||||||||||
| Late Reveries | ⌽ Subs for Flutterpage or Cheng include Rhiannon, Lopera, Mercuria, or any other general support. ⌽ Marsha can be substituted by Enigma, Vila (E1), Fatutu, or any other AFK sustain. ⌽ You can use Liang with Lorentz (+Marsha) to print multiple high rank Liang Buffs. At P0, getting Lorentz Ult every other turn is rather painful. Flutterpage can be replaced by Isolde here (only better on high support ports). | ||||||||||||
| ✔✔ | |||||||||||||
| Difficulty | |||||||||||||
| Difficult | |||||||||||||
| Team Tier | |||||||||||||
| DPS | Essential | Utility | Essential | Sustain | Flexible | Utility | Flexible | T0 | |||||
| Liang Yue (E1) | Flutterpage | Marsha | Cheng Heguang | ||||||||||
| Where Channel Cards | Team Performance | ||||||||||||
 |  |  |  | Viability | Explanation | META Relevance | |||||||
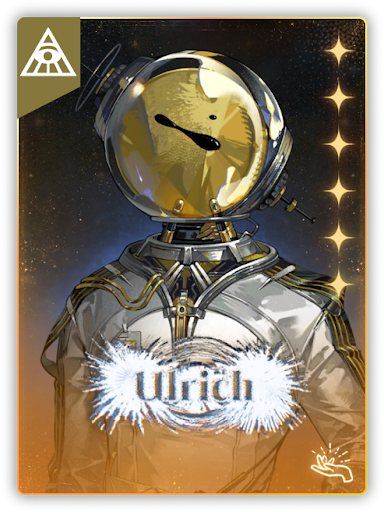
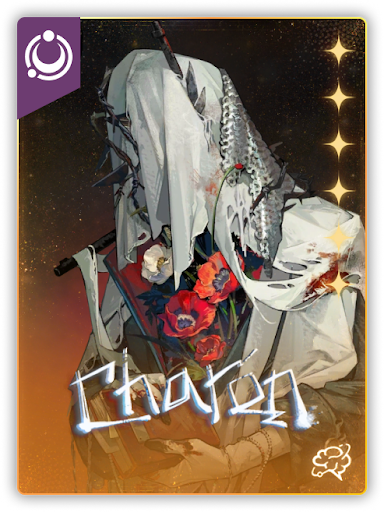
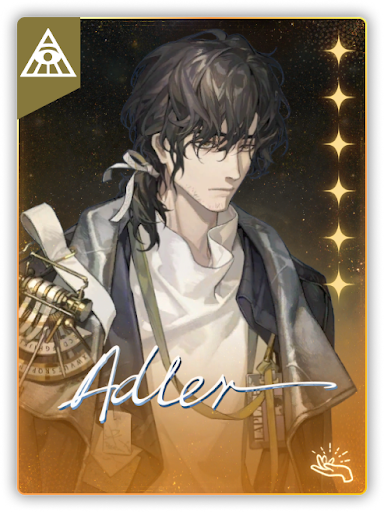
| Lucidscape | ⌽ The team centers around Brume's high damage channel during Tier 3 dyanmo array. ⌽ Keep a 133 array rotation. ⌽ Aim to use at least both Brume cards every single turn, use the attack only to refresh the buff. ⌽ Use Charon cards turn 1 and Ult turn 2 and then AFK him. ⌽ Keep Ulrich channeled for short fights, or keep Corvus channeled for long fights with double Ults in tier 3. ⌽ Remaining AP flexible, Ult every other turn on Enigma but at least cover the tier 3 turns. | ⌽ One of the top short fight team with Ulrich, and one of the top long fight team with Corvus. | |||||||||||
| ✔ | |||||||||||||
| Raid | |||||||||||||
| T0 | |||||||||||||
| Focused Flashback | |||||||||||||
| T1 | Substitutes | ||||||||||||
| Late Reveries | ⌽ Alternative sustains: Fatutu, Vila (E1), or anyone AFK, but will need a 1133 rotation. ⌽ Similar to the other dynamo teams. ⌽ Anjo bind Brume replace Ulrich also works, but is outclassed when Enigma is used. | ||||||||||||
| ✔✔ | |||||||||||||
| Difficulty | |||||||||||||
| Medium | |||||||||||||
| Team Tier | |||||||||||||
| Utility | Negotiable | Utility | Essential | DPS | Negotiable | Sustain | Negotiable | T0 | |||||
| Ulrich | Charon | Brume | Enigma | ||||||||||
| Poison | Team Performance | ||||||||||||
 |  |  | | Viability | Explanation | META Relevance | |||||||
| Lucidscape | ⌽ Deals Genesis damage through Poison, bypassing enemy defences and DMG Reduction. ⌽ This team will use a 4 turn rotation, eg "turn 2" means turn 2 of the rotation, which will be turns 2/6/10 etc of the battle. ⌽ Use Tuesday's Ultimate on turn 2, keep her S2 up with as high rank as you can without compromising the rotation. ⌽ Use Willow S1 on turn 1 or 2, use her Ult when available. ⌽ Use Ramona Ult on turns 1 AND 2, always use the precast S2, use extra S2s to detonate on turns 3-4. ⌽ Use Ramona S1 or Tuesday S1 to apply poison on turn 1. ⌽ Use Marsha Ult on turns 2-4. ⌽ [Poison] will crit based on crit stats at the time of calculation (instead of on application like ATK), eg Vila/Marsha buff doesn't need to always be active. | ⌽ Some stages ban poison with auto-cleanse or debuff immunity. ⌽ Lose 15% DPT on the easier 3-turn rotation. ⌽ One of the top DPT team in raids | |||||||||||
| ✔ | |||||||||||||
| Raid | |||||||||||||
| T0 | |||||||||||||
| Focused Flashback | |||||||||||||
| T1 | Substitutes | ||||||||||||
| Late Reveries | ⌽ Lorentz Butterfly (copy Willow S2), Jessica (E2), Flutterpage are good alternative supports. ⌽ Replace Willow with Recoleta (E1) is nice for fights < 3 turns. ⌽ Replace Willow with Ezio is better with respawning minions. ⌽ Vila (E1) or any other AFK sustains work. | ||||||||||||
| ✔ | |||||||||||||
| Difficulty | |||||||||||||
| Medium | |||||||||||||
| Team Tier | |||||||||||||
| DPS | Negotiable | Utility | Essential | Utility | Essential | Sustain | Flexible | T0 | |||||
| Willow (E1) | Tuesday (E1) | Ramona | Marsha | ||||||||||
| Electric Wheelchair | Team Performance | ||||||||||||
| |  |  | Viability | Explanation | META Relevance | |||||||
| Lucidscape | ⌽ Dynamo wheelchair gives a lot of buffs for Ms. Stranger large Ultimates (or another DPS). ⌽ Alternate between Ms. Stranger's Ultimate and [A Moth to a Flame] every round. ⌽ Enigma Ult every other turn starting on turn 3 (should be automatic). ⌽ Use Charon's Ult whenever it's up, startup with both of his cards on turn 1. | ⌽ Can brute force almost every stage. ⌽ One of the top DPT team in the game. | |||||||||||
| ✔ | |||||||||||||
| Raid | |||||||||||||
| T0 | |||||||||||||
| Focused Flashback | |||||||||||||
| T1 | Substitutes | ||||||||||||
| Late Reveries | ⌽ Recoleta (E1), Silverwing Eagle, Coppelia, Centurion (E1) fit the wheelchair nicely too. ⌽ Ulrich, Lopera, Moldir, Getian (E1), Melania (E1) are good alternative supports. ⌽ Marsha, Medicine Pocket (E1), Rubuska, or other AFK sustains also work. | ||||||||||||
| ✔✔ | |||||||||||||
| Difficulty | |||||||||||||
| Easy | |||||||||||||
| Team Tier | |||||||||||||
| Sustain | Negotiable | Utility | Negotiable | DPS | Flexible | Utility | Negotiable | T0 | |||||
| Enigma | Charon | Ms. Stranger | Rhiannon | ||||||||||
| Dynamo But Moxie Counting | Team Performance | ||||||||||||
| |  | | Viability | Explanation | META Relevance | |||||||
| Lucidscape | ⌽ Centers around the [Pulsing Field] array, notation 1133 means 2 turns of tier 1 and 2 turns of tier 3. ⌽ Inject Dynamo into the array to level it up as fast as possible and save attacks for burst damage during Level 3. ⌽ Charon changes the [Pulsing Field] array to aim for a a faster rotation. AFK him after a S2 and his first Ult. ⌽ For Corvus or Ulrich DPS, use an Ult on both turns of the tier 3 array, 1133 for the comfortable rotation, 133 if you can Ult 3 turns in a row (hence moxie counting). ⌽ Keep Flutterpage in tier 3 forcefield, or If using Ulrich, just keep him channeled. ⌽ For Lucy dps, keep a 133 rotation. ⌽ Keep Enigma's Ult up on tier 3. | ⌽ One of the strongest team in the game with Brume or Corvus as DPS. ⌽ Corvus takes forever to stack but is one of the strongest team for raids with FP. ⌽ Lucy is best in lucidscape. | |||||||||||
| ✔ | |||||||||||||
| Raid | |||||||||||||
| T0 | |||||||||||||
| Focused Flashback | |||||||||||||
| T1 | Substitutes | ||||||||||||
| Late Reveries | ⌽ Brume, Lucy, or Ulrich can be the DPS too. ⌽ Rhiannon, Ulrich, Brume, Mercuria (E1), or Melania are alternative supports. ⌽ Fatutu, Marsha, Kiperina, or other AFK sustains also work, but slow down the rotation by 1 turn. | ||||||||||||
| ✔✔ | |||||||||||||
| Difficulty | |||||||||||||
| Medium | |||||||||||||
| Team Tier | |||||||||||||
| Sustain | Negotiable | Utility | Negotiable | DPS | Negotiable | Utility | Essential | T0 | |||||
| Enigma | Flutterpage | Corvus | Charon | ||||||||||
| Conduit | Team Performance | ||||||||||||
 |  | |  | Viability | Explanation | META Relevance | |||||||
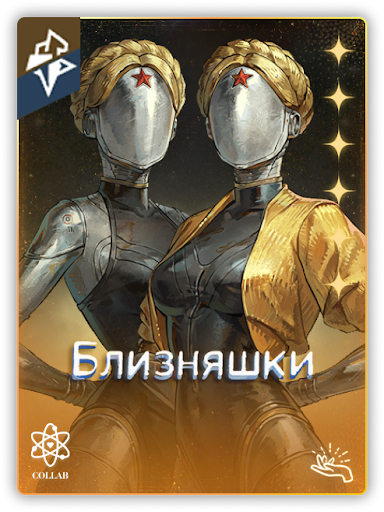
| Lucidscape | ⌽ The Twins can switch between the Mineral and Star sets to deal with different enemies. Use [Efficient Conversion] or [Pulse Amplification] depending on the active set. Any energy played but not used during the turn will be wasted. ⌽ Mineral set uses more energy to deal higher damage based on recorded energy consumption. Star set uses less energy to spam more incantation. ⌽ Coppelia should ideally be only using her buff card. All energy consumption should go to The Twins. ⌽ The Twins' Ult requires 12 energy consumed to get the maximum bonus. Coppelia's Ult should be used in the same turn to increase the recorded energy consumption by 4. ⌽ Coppelia's Ult flux her immediately into her attack card. Using it in the same turn as The Twins' Ult have the added benefit of Coppelia not using her attack card. | ⌽ Highest frontload DPT in the game. Falls off in Raid due to having zero ramp-up. | |||||||||||
| ✔ | |||||||||||||
| Raid | |||||||||||||
| T1 | |||||||||||||
| Focused Flashback | |||||||||||||
| T1 | Substitutes | ||||||||||||
| Late Reveries | ⌽ Teambuilding is even more rigid compared to Impromptu, due to how unique the energy cards are. ⌽ Alternative Utility slot include Isolde, Lopera, J. ⌽ Regulus (E2) can be used as another DPS option if you missed The Twins (or dropped for another support and use Coppelia DPS) | ||||||||||||
| ✔✔ | |||||||||||||
| Difficulty | |||||||||||||
| Medium | |||||||||||||
| Team Tier | |||||||||||||
| Utility | Essential | DPS | Essential | Utility | Negotiable | Sustain | Essential | T0 | |||||
| Coppelia | The Twins | Rhiannon | Everecho | ||||||||||
| Plantpromptu | Team Performance | ||||||||||||
 | |  |  | Viability | Explanation | META Relevance | |||||||
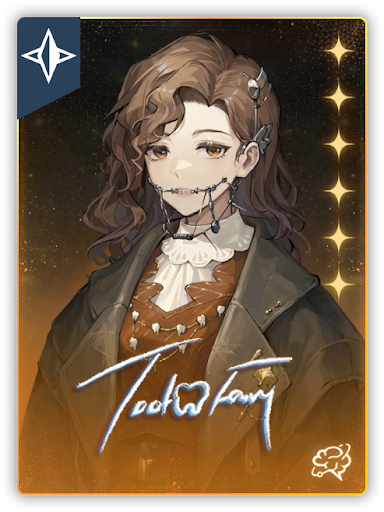
| Lucidscape | ⌽ Paper Heron limits the number of hits Impromptu Incantation can do to 3, changes its Afflatus to Plant, makes it deal Reality damage, significantly increases its base damage multiplier, and splits its damage to 3 random targets. ⌽ Rhiannon after her warmup using her cards for 3 turns will be able to always throw her cards. ⌽ Tooth Fairy should use S1 every turn and use S2 as needed to Ult around every 3 turns. ⌽ Paper Heron should use S2 every turn, and an ocassional S1 to use Ult every 4 turns. ⌽ Leftover AP can go on Kiperina to charge her Ult when possible. ⌽ Try to line up their Ults for large burst turns. | ⌽ One of the top DPT team in the game ⌽ One of the most auto-friendly team in the game. | |||||||||||
| ✔ | |||||||||||||
| Raid | |||||||||||||
| T1 | |||||||||||||
| Focused Flashback | |||||||||||||
| T1 | Substitutes | ||||||||||||
| Late Reveries | ⌽ As with the original Starpromptu, has very rigid teambuilding. ⌽ Rhiannon can be replaced by Mercuria (in which case, all AP goes to TF and Heron) or An-an Lee (E2). ⌽ Barcarola could be used when standing in front of Paper Heron. | ||||||||||||
| ✔✔ | |||||||||||||
| Difficulty | |||||||||||||
| Easy | |||||||||||||
| Team Tier | |||||||||||||
| Utility | Essential | Utility | Negotiable | Utility | Essential | Sustain | Essential | T0 | |||||
| Paper Heron | Rhiannon | Tooth Fairy (E1) | Kiperina | ||||||||||
| Bloodtithe | Team Performance | ||||||||||||
 |  | |  | Viability | Explanation | META Relevance | |||||||
| Lucidscape | ⌽ The Bloodtithe team revolves around rapidly consuming HP and healing back up to generate Bloodtithe. ⌽ Nautika's Ultimate is this team's main source of damage. Make sure she has [Adversity] status, max [Higge] stacks, and at least 40 Bloodtithe before casting it. Also, always keep her counter up. ⌽ Semmelweis provides a lot of buffs and Bloodtithe with minimal AP (one Ultimate and one S2 every 3 turns). ⌽ Rhiannon gives even more buffs. Use her freely after the first Ult. ⌽ Rubuska passively heals and buffs while generating Bloodtithe. Use her Ultimate on the same turn as Nautika's Ultimate. | ⌽ DPT is higher in the endgame-modes due to very high enemy damage stacking lots of Bloodtithe for free, in extreme cases a full-strength Nautika Ult every single turn can be sustained which significantly boosts DPT. | |||||||||||
| ✔ | |||||||||||||
| Raid | |||||||||||||
| T1 | |||||||||||||
| Focused Flashback | |||||||||||||
| T1 | Substitutes | ||||||||||||
| Late Reveries | ⌽ Double sustain is preferred in very high pressure stages. ⌽ Rhiannon subs: Sentinel, Flutterpage, and Melania (E1), Sentinel bullets run out quickly at very high pressures. ⌽ Rubuska subs: Fatutu (HP sharing counts as self-dmg) or Medicine Pocket (E1). ⌽ Notably, Eternity (E2) is not a support option, but a budget DPS replacement for Nautika. | ||||||||||||
| ✔✔ | |||||||||||||
| Difficulty | |||||||||||||
| Easy | |||||||||||||
| Team Tier | |||||||||||||
| Utility | Essential | DPS | Essential | Utility | Flexible | Sustain | Flexible | T1 | |||||
| Semmelweis (E1) | Nautika (E1) | Rhiannon | Rubuska | ||||||||||
| Burn but Good | Team Performance | ||||||||||||
 |  |  | | Viability | Explanation | META Relevance | |||||||
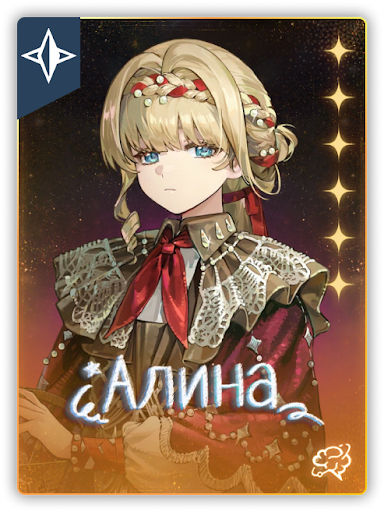
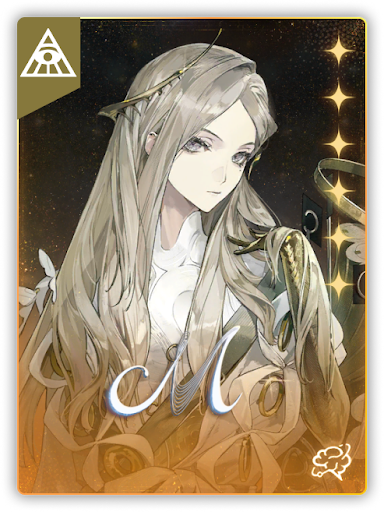
| Lucidscape | ⌽ A team centered around the new [Lingering Glow] mechanic, which accumulates when enemies are afflicted with [Burn] or [Halo] (essentially the same as [Burn]) ⌽ Choose double purple Emanations for Beryl, blue is only good when you have limited Lingering Glow supports. ⌽ Cast Beryl's Ult every other turn, and ensure she has [Vision]. ⌽ Isolde should reach her [Finale] state within 4 rounds. Make sure to keep her S2 debuff applied. ⌽ Lorentz should use Ult every other turn and duplicate her S1, use her S2 only with another character's Buff card ⌽ Marsha should use Ult every other turn. ⌽ Ideally merge for Lorentz or Beryl every 2 turns to keep the Ult rotation. | ⌽ Can brute force almost every stage. ⌽ One of the top DPT team in the game. | |||||||||||
| ✔ | |||||||||||||
| Raid | |||||||||||||
| T1 | |||||||||||||
| Focused Flashback | |||||||||||||
| T1 | Substitutes | ||||||||||||
| Late Reveries | ⌽ Marsha can be replaced by any other good sustain, including J (E1), Enigma, Fatutu, etc. ⌽ Lorentz can be replaced by any other Incantation based support, such as Rhiannon, Flutterpage, Mercuria, or Lopera ⌽ Spathodea (E1) is the budget Beryl, at approximately 75% of her dpt in ST, funnily Liang (E1) at P1+ also works in place of Beryl with Lorentz printing Liang Buff cards. | ||||||||||||
| ✔✔ | |||||||||||||
| Difficulty | |||||||||||||
| Medium | |||||||||||||
| Team Tier | |||||||||||||
| DPS | Essential | Utility | Essential | Utility | Negotiable | Sustain | Flexible | T1 | |||||
| Beryl | Isolde (E1) | Lorentz Butterfly | Marsha | ||||||||||
| Ult Spam | Team Performance | ||||||||||||
 |  |  | | Viability | Explanation | META Relevance | |||||||
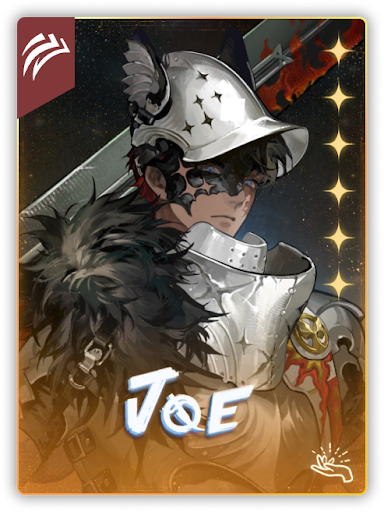
| Lucidscape | ⌽ Note: J is also DPS, and his Ultimate currently has bugged scalings. ⌽ The team revolves around Recoleta cycling the DPS' Ult with her [Flood of Fiction] card. ⌽ J Ultimate apply burn based on his own burn stacks and gain increased multiplier from excess burn applied. Cast 2 ultimate in a single turn with [Flood of Fiction]. ⌽ Stack Melania's [Fixed Plan] to 6. Use [Flood of Fiction] early in battle to stack this. She can AFK for the rest of the battle. ⌽ Cast Recoleta S1 or Melania's S2 to help with the team's moxie gain and cycle the DPS and Reco's Ult every 2 turns. | ⌽ Can brute force almost every stage. ⌽ Teambuilding relatively flexible and can be scaled when future Ult DPS get released. | |||||||||||
| ✔ | |||||||||||||
| Raid | |||||||||||||
| T1 | |||||||||||||
| Focused Flashback | |||||||||||||
| T1 | Substitutes | ||||||||||||
| Late Reveries | ⌽ Utility slot can be dropped for another Ultimate DPS like Ms. Stranger. ⌽ Alternative Utility slot include Isolde, Moldir, Getian, Lopera. ⌽ Alternative Sustain include Enigma (Dynamo), Marsha, or any AFK sustain. | ||||||||||||
| ✔✔ | |||||||||||||
| Difficulty | |||||||||||||
| Medium | |||||||||||||
| Team Tier | |||||||||||||
| Utility | Essential | Sustain | Negotiable | Utility | Flexible | Utility | Flexible | T1 | |||||
| Recoleta (E1) | J (E1) | Melania (E1) | Rhiannon | ||||||||||
| IgOrphanage | Team Performance | ||||||||||||
 |  |  | | Viability | Explanation | META Relevance | |||||||
| Lucidscape | ⌽ Centers around Igor's large, automatic, extra action Ults. ⌽ Goal is to have Igor Ult every turn if possible (i.e. get him to 8 moxie every turn). ⌽ Use Lopera S2 once at the very beginning, then Ult every 3 turns. ⌽ Use Moldir's Ult every turn if possible, be it from riposte or from active cast. ⌽ Use both Igor cards to stack his buff. ⌽ Use other cards as needed to give Igor moxie. | ⌽ DPT falls just short of top teams. ⌽ Team scales a lot better with higher Igor Portray | |||||||||||
| ✔ | |||||||||||||
| Raid | |||||||||||||
| T1 | |||||||||||||
| Focused Flashback | |||||||||||||
| T1 | Substitutes | ||||||||||||
| Late Reveries | ⌽ Igor's kit calls out Moldir and Lopera by name for extra buffs for both himself and for them. ⌽ If you're desperate, Getian (E1) (in Lopera's place) or Melania (E1)/Flutterpage (in Moldir's place) can work as substitutes. ⌽ Flutterpage in Moldir's place becomes smoother with Igor's P1, and becomes better with more Igor portraits. ⌽ Marsha, or any other AFK sustain works as an alternative. | ||||||||||||
| ✔✔ | |||||||||||||
| Difficulty | |||||||||||||
| Medium | |||||||||||||
| Team Tier | |||||||||||||
| DPS | Essential | Utility | Negotiable | Utility | Essential | Sustain | Flexible | T2 | |||||
| Igor | Moldir | Lopera | J (E1) | ||||||||||
| Riposte | Team Performance | ||||||||||||
| |  | | Viability | Explanation | META Relevance | |||||||
| Lucidscape | ⌽ Note: J is also DPS, and his Ultimate currently has bugged scalings. ⌽ Very simple gameplay, maintain J's shield and Cornerstone's [Inspection Process] and get attacked. ⌽ J ripostes and grants more shield when allies are attacked while his shield is up. ⌽ J's Ultimate and Cornerstone's [Delivery Feedback] also do great damage. ⌽ Great against stages where there are multiple enemies or enemies have high AP/AOE attacks. | ⌽ Can brute force almost every stage. ⌽ DPT falls just short of top teams. | |||||||||||
| ✔ | |||||||||||||
| Raid | |||||||||||||
| T1 | |||||||||||||
| Focused Flashback | |||||||||||||
| T1 | Substitutes | ||||||||||||
| Late Reveries | ⌽ The last two slots are very flexible. ⌽ Anjo Nala (E1), Isolde (E1), Melania (E1) and Recoleta (E1) are good alternatives. | ||||||||||||
| ✔✔ | |||||||||||||
| Difficulty | |||||||||||||
| Foolproof | |||||||||||||
| Team Tier | |||||||||||||
| Sustain | Essential | Utility | Flexible | DPS | Negotiable | Utility | Flexible | T2 | |||||
| J (E1) | Rhiannon | Cornerstone | Flutterpage | ||||||||||
| Windsong | Team Performance | ||||||||||||
 | |  | | Viability | Explanation | META Relevance | |||||||
| Lucidscape | ⌽ Centers around Windsong's [Measure] stack interacting with Flutterpage's Forcefield. ⌽ Use Windsong S2 card to print out her S1. Merge the precast S1 to keep them in hand. Use [Unfinished Tuning] to delete unused cards and print out even more S1 and S2 ⌽ Use 6 buff card as Eureka battery to charge up Windsong's [Measure] stack faster. ⌽ Flutterpage needs to have 25 [Gust] stacks before the burst turn to convert Windsong's massive Crit Rate and Crit Damage into DMG Bonus. ⌽ J Riposte especially in high AOE content helps with stacking Windsong's [Measure] faster and ensure Flutterpage's [Gust] always have atleast 25 stacks. It also help to cover Windsong's lacking performance in AOE battle. | ⌽ Can clear Focused Flashback due to Windsong's ability to setup burst in turn 5 / 6, but struggles if it's a stage that requires to clear multiple enemies. ⌽ Requires some preparation so everything lines up for the burst turn. Might not be suitable for new players. | |||||||||||
| ✔ | |||||||||||||
| Raid | |||||||||||||
| T1 | |||||||||||||
| Focused Flashback | |||||||||||||
| T2 | Substitutes | ||||||||||||
| Late Reveries | ⌽ Lorentz Butterfly can be used in 6's slot to print out Windsong Rank 3 S1 to unleash during Ult turn ⌽ Rhiannon, Mercuria, Lopera can be used as alternative Utility slot. ⌽ Vila can conceivably give Windsong the highest DPT if she can keep the team alive. ⌽ Marsha, Enigma, and other AFK sustain can also be used as alternative sustain options. | ||||||||||||
| ✔ | |||||||||||||
| Difficulty | |||||||||||||
| Difficult | |||||||||||||
| Team Tier | |||||||||||||
| DPS | Essential | Utility | Essential | Utility | Flexible | Sustain | Flexible | T2 | |||||
| Windsong (E1) | Flutterpage | 6 (E1) | J (E1) | ||||||||||
| Starpromptu | Team Performance | ||||||||||||
 | |  | | Viability | Explanation | META Relevance | |||||||
| Lucidscape | ⌽ Focus on keeping the ULT rotation going, IGNORE WHICH CARDS HAVE MORE INSPIRATION. ⌽ 2 or 3-turn cycle Barcarola Ult to keep it on 2-3 allies, she'll use the most AP. ⌽ Use 1-2 Aleph cards every turn. ⌽ Use Rhiannon cards in the first few turns, then they'll become free to always throw. ⌽ Kiperina easily keeps the team alive without using any AP. | ⌽ Takes a while to warm up Barcarola's Ults. ⌽ High damage on raids with Rhiannon when targeting doesn't matter. | |||||||||||
| ✔ | |||||||||||||
| Raid | |||||||||||||
| T2 | |||||||||||||
| Focused Flashback | |||||||||||||
| T1 | Substitutes | ||||||||||||
| Late Reveries | ⌽ Put Paper Heron first for 3x split, or Voyager or Regulus to focus the attack when there are respawning minions. ⌽ If there is no need to aim, Rhiannon > Tooth Fairy (E1) > Mercuria (E1) > Brume gives higher damage than Regulus and Voyager. ⌽ Marsha, Enigma, or other AFK sustains can work. | ||||||||||||
| ✔✔ | |||||||||||||
| Difficulty | |||||||||||||
| Medium | |||||||||||||
| Team Tier | |||||||||||||
| Utility | Essential | Sustain | Essential | Utility | Essential | Utility | Negotiable | T2 | |||||
| Aleph | Kiperina | Barcarola | Rhiannon | ||||||||||
| Rank Up | Team Performance | ||||||||||||
 |  |  |  | Viability | Explanation | META Relevance | |||||||
| Lucidscape | ⌽ The entire team is built around synergies involving using and buffing high tier incantations. ⌽ Vila needs to use 3 AP per rotation to keep her buff up, rotation can be either 3 or 4 turns. ⌽ Druvis E1 or E2 should both be fully afk. ⌽ Argus (E1) should refresh buff every other turn and always aim for double rank 3 FUAs. ⌽ Marcus (E1) if she's used should take all the remaining spare AP on high rank cards or Ult. ⌽ Mercuria (E1) gives a large buff and good sub-dps and for very little AP. | ⌽ Can brute force almost every stage, up to Reveries. ⌽ DPT falls just short of top teams. | |||||||||||
| ✔ | |||||||||||||
| Raid | |||||||||||||
| T3 | |||||||||||||
| Focused Flashback | |||||||||||||
| T3 | Substitutes | ||||||||||||
| Late Reveries | ⌽ Rhiannon, Argus (E1), Marcus (E1), Druvis (E2), and Mercuria (E1) can be rotated in or out. ⌽ Listed team has the best general DPT, Marcus (E1) Argus (E1) Mercuria (E1) are better DPT only when there is plant afflatus advantage. ⌽ Supports or sustains that can buff Crit Rate, like Charon, Kiperina (Vila's heals are multiple crits), Lopera are good alternatives. | ||||||||||||
| ✔ | |||||||||||||
| Difficulty | |||||||||||||
| Foolproof | |||||||||||||
| Team Tier | |||||||||||||
| DPS | Negotiable | Utility | Negotiable | Utility | Negotiable | Sustain | Essential | T3 | |||||
| Argus (E1) | Druvis III (E2) | Mercuria (E1) | Vila (E1) | ||||||||||
| Generic FUA | Team Performance | ||||||||||||
 | | | | Viability | Explanation | META Relevance | |||||||
| Lucidscape | ⌽ Centered around the two extremely strong Extra-Action (EA) supports of Flutterpage and Fatutu. ⌽ At Tier 3 Forcefield, Flutterpage buffs EA damage (including genesis damage for 37) based on their Crit Rate and Crit Dmg, which is a massive increase considering most EA teams give high Crit. ⌽ With E1, Anjo can use Ultimate every single turn, any spare AP can go towards the binded's actions. ⌽ Flutterpage also supplies numerous EA during her Ult, giving good synergy with most EA DPSs and Fatutu. ⌽ Keep the other supports buffs as usual, preferably crit buffs to stack with Flutterpage. | ⌽ Same supports have tons of DPS options, usually at least one of them will be able to clear any one stage. ⌽ Performance scales up when future FUA DPS get released. | |||||||||||
| ✔ | |||||||||||||
| Raid | |||||||||||||
| T3 | |||||||||||||
| Focused Flashback | |||||||||||||
| T2 | Substitutes | ||||||||||||
| Late Reveries | ⌽ Other DPS options include Liang (E1), Kalaa Bauna (E1), Ezio, etc. ⌽ Other support options include Mercuria (E1), Charon, Rhiannon, Lopera. ⌽ Other sustain options include Enigma, Kiperina, or Marsha. | ||||||||||||
| ✔ | |||||||||||||
| Difficulty | |||||||||||||
| Foolproof | |||||||||||||
| Team Tier | |||||||||||||
| DPS | Flexible | Utility | Essential | Sustain | Flexible | Utility | Flexible | T3 | |||||
| Anjo Nala (E1) | Flutterpage | Kiperina | Lopera | ||||||||||
| Assassin Ult | Team Performance | ||||||||||||
 |  |  | | Viability | Explanation | META Relevance | |||||||
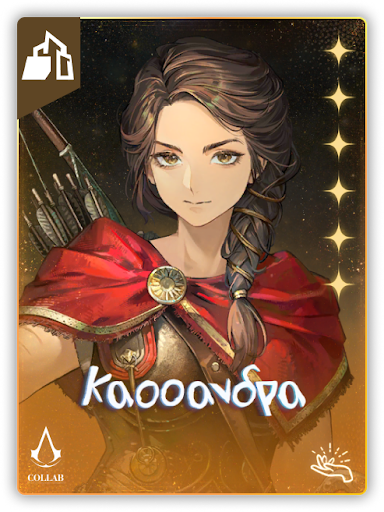
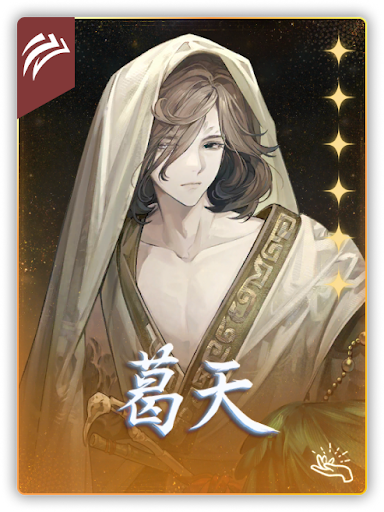
| Lucidscape | ⌽ A team focused on rapidly cycling Ezio and Kassandra's powerful Ults ⌽ Use Ezio's Ult weapon, and Kassandra's 2-0-3 skills ⌽ Getian spamming ults allow Ezio to Ult every other turn, while Kassandra a regular and pre-cast Ult every single turn. ⌽ Must keep rotation of double Kassandra Ult every turn and Ezio Ult every other turn to keep the cycle going or damage drastically decreases. | ⌽ More counters will favour EA and poison weapons, and higher defence will favour poison. | |||||||||||
| ✔ | |||||||||||||
| Raid | |||||||||||||
| T3 | |||||||||||||
| Focused Flashback | |||||||||||||
| T3 | Substitutes | ||||||||||||
| Late Reveries | ⌽ Over 30% of the DPT will be lost if you're missing either Kassandra or Getian (E1) ⌽ Other Ult supports/spammers like Melania (E1), Moldir, Hissabeth etc. can be used in a pinch. ⌽ Alternative sustains include Enigma, Rubuska, Kiperina, and Vila (E1). | ||||||||||||
| ✔ | |||||||||||||
| Difficulty | |||||||||||||
| Medium | |||||||||||||
| Team Tier | |||||||||||||
| DPS | Essential | Utility | Essential | Utility | Essential | Sustain | Flexible | T3 | |||||
| Ezio Auditore | Kassandra | Getian (E1) | Marsha | ||||||||||
| Poisoned Blade | Team Performance | ||||||||||||
| | | | Viability | Explanation | META Relevance | |||||||
| Lucidscape | ⌽ A less tricky version of the Poison team that instead relies on Ezio's Ripostes on S2, using it to deal High amounts of Genesis dmg and building up big nukes on his Ult. ⌽ Strongest when you can trigger many counters to let Ezio do more damage, apply more poison, and Ult more frequently ⌽ In Reveries, Furry Nala's top right branch allows continuously extended Neg Stat (poison) duration for ridiculously large amounts of poison. ⌽ Ezio's Additional Genesis DMG can Crit so long as there are 20 poison stacks, meaning Tuesday's Array will help in keeping those Poison stacks active. | ⌽ Soft-banned in certain stages by cleanse / immunity. ⌽ The preferred Ezio team in high defense / damage reduction stage. | |||||||||||
| ✔ | |||||||||||||
| Raid | |||||||||||||
| T3 | |||||||||||||
| Focused Flashback | |||||||||||||
| T3 | Substitutes | ||||||||||||
| Late Reveries | ⌽ Alternative supports include Jessica (E2) and Willow. ⌽ Alternative sustains include Vila, Kiperina, Fatutu. | ||||||||||||
| ✔ | |||||||||||||
| Difficulty | |||||||||||||
| Easy | |||||||||||||
| Team Tier | |||||||||||||
| Utility | Negotiable | Utility | Essential | DPS | Essential | Sustain | Flexible | T3 | |||||
| Flutterpage | Tuesday | Ezio Auditore | Marsha | ||||||||||
| Scrat | Team Performance | ||||||||||||
 | | | | Viability | Explanation | META Relevance | |||||||
| Lucidscape | ⌽ A more budget-friendly version of Recoleta's Ult Nuke team. ⌽ Works well with Anjo Assist boss, spamming Ults in reveries. ⌽ Team relies on cycling a lot of Ults to pump out Buddy Fairchild's Ult quickly. | ⌽ Strong enough to brute force most stages, up to Reveries. ⌽ Free 5* and a support from reveries assist rotation makes this team very cheap. | |||||||||||
| ✔ | |||||||||||||
| Raid | |||||||||||||
| T3 | |||||||||||||
| Focused Flashback | |||||||||||||
| T3 | Substitutes | ||||||||||||
| Late Reveries | ⌽ Ulrich, Lopera, or Name Day, Mercuria (E1) can be used as substitute supports. ⌽ Vila (E1) or any AFK sustain works. ⌽ Hissabeth, Moldir, AKnight can be alternative DPSs or substitute supports for their buffs and/or quick Ult cycle. | ||||||||||||
| ✔ | |||||||||||||
| Difficulty | |||||||||||||
| Easy | |||||||||||||
| Team Tier | |||||||||||||
| DPS | Essential | DPS | Flexible | Utility | Flexible | Sustain | Flexible | T3 | |||||
| Buddy Fairchild | Getian (E1) | Melania (E1) | Marsha | ||||||||||